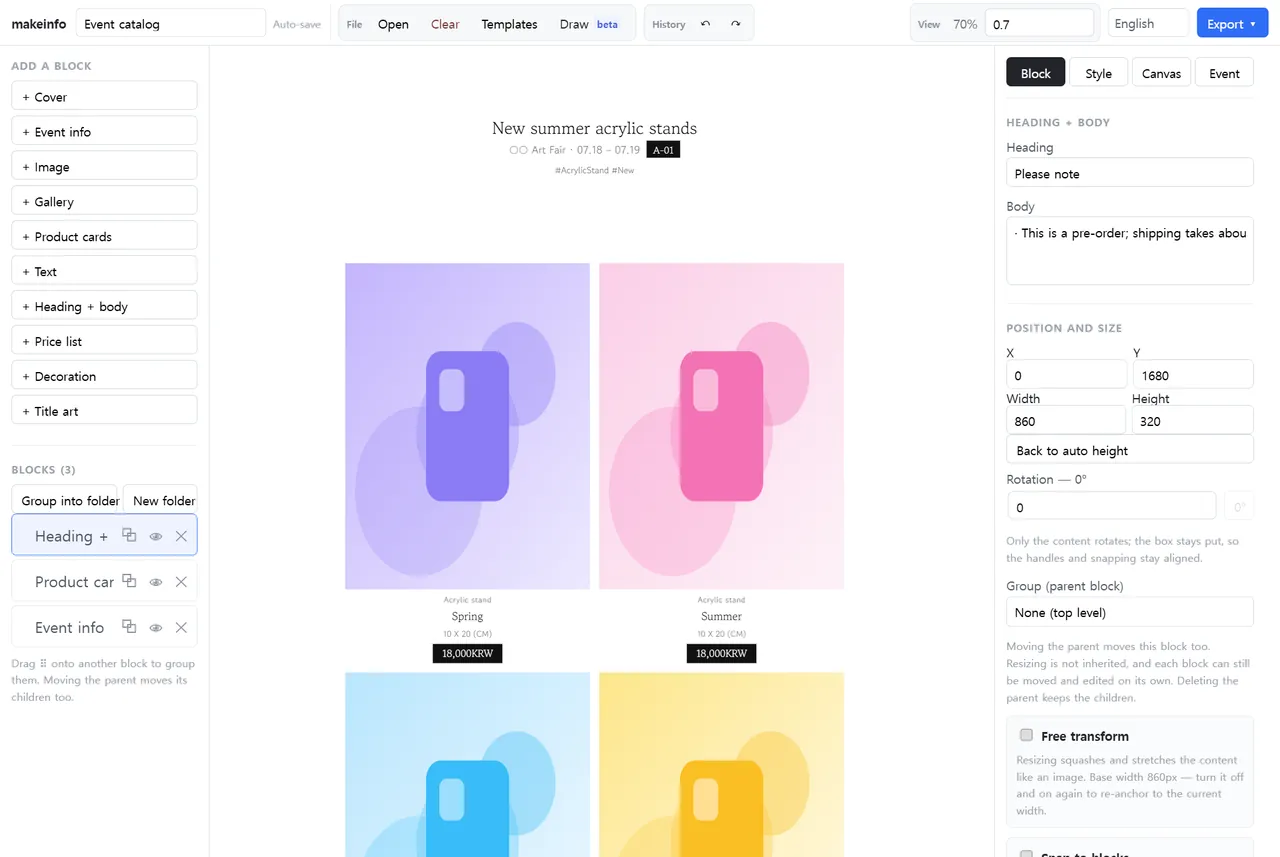
What does it make?
It makes the price sheet you post before a convention — the single image listing your table number and everything you are bringing, with prices. Some people call it a menu, a catalog or a pre-order form; the contents are the same either way. You do not have to reopen Photoshop the night your prints come back from the printer.
The same editor also makes the tall product pages that online shops ask for. Instead of starting from a blank canvas, you stack blocks that already know what they are for, so neither job turns into a layout problem.
These are the blocks you can use.
- Event info — event name, dates, table or booth number and circle name, gathered at the top. A price sheet starts here.
- Cover — puts the title and main image up large.
- Product cards — for laying out several items at once. You choose the number of columns and how much room each item takes.
- Price table — lines up items and amounts, including bundle prices and discounts.
- Image and gallery — one preview image, or several in a grid.
- Heading and body — payment methods, purchase limits, whether there will be an online shop afterwards.
- Shop details — contact and social handles at the bottom.
Drag blocks to reorder them, delete the ones you do not need. If stacking from scratch feels like work, pick a template and swap the contents.
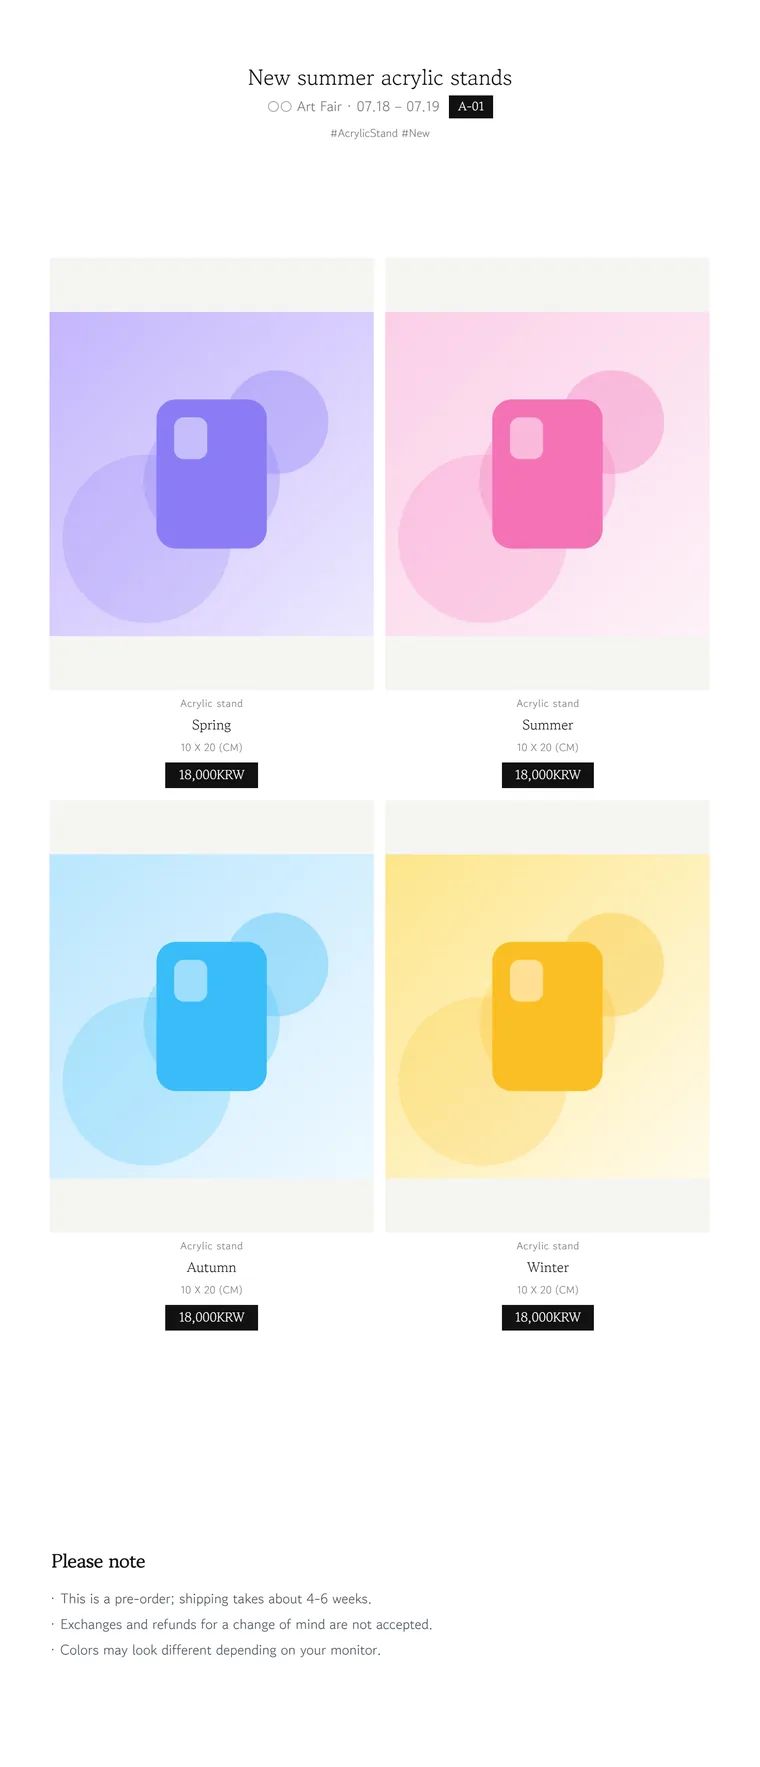
What goes on a price sheet?
Answer the questions you would otherwise field all weekend. This much is enough.
- Circle name and table number — this is how people find you. Top of the sheet, biggest text.
- Event name and dates — if you are doing several cons, make it obvious which one this is.
- Items and prices — keep new releases, back catalogue and merch in separate groups.
- Specs — B5 / 34pp for a book, dimensions for merch. Say whether an acrylic stand includes its base.
- Bundle prices — if buying the set saves money, show how much.
- Payment methods — cash only, or card and tap-to-pay. This is the single most common question at the table.
- Online shop plans — say so if items will be available afterwards, so selling out is not a lost sale.
Build it for a phone. In a timeline it first appears about the size of a thumbnail. Check that the prices and table number still read when it is shrunk down.
How it goes
- Pick a template or start empty. The default canvas is 860px wide, matching the vertical image width commonly used on social platforms and shop listings.
- Stack your blocks. Add what you need from the list on the left and edit the text directly on the canvas. Individual items inside a block can be selected and edited on their own.
- Set colour and type with a theme. Rather than recolouring block by block, pick a theme and the whole sheet follows.
- Export. Choose the format that suits where the file is going, and it downloads.
Choosing an export format
All four look like "save", but only one can be opened again for editing. Keep only the split PNG and there is no way back into the file later.
| Format | Use it for | Editable again |
|---|---|---|
| Full PNG | Posting to social, and keeping your master copy | Yes. The project data is stored inside the image. |
| Split PNG | Shops that cap the height of a single image | No. |
| Sending to a print shop, attaching to email | No. | |
| PSD | Finishing up in Photoshop | In Photoshop only. |
Keep your master as a full PNG. Drop that file back into the editor and the work reopens exactly as you left it. Next con you only swap the dates and the new releases.
If you need a sharper file, do not widen the canvas — set the export scale to 2×. You keep working at 860px and the result comes out at 1720px.
When a long sheet has to be split
Every shop allows a different maximum height for a single image. Split PNG cuts the sheet into several pieces at the height you set. What matters is not cutting through the middle of a block — makeinfo looks for the gaps between blocks first and splits there when it can.
The cut lines you see while editing are there to show you where the breaks fall. They are not drawn into the exported image.
Where does the work live?
In your browser. Nothing is uploaded to a server. The images you add and the sheets you build stay in this computer's browser storage, and when you export, the file is produced right there and downloaded.
That is why there is no account to create, and why the cover of an unannounced book never sits on somebody else's server. The flip side is that clearing your browser data clears the work too, so export anything important as a full PNG and keep it somewhere else. Moving that file is also how you continue on another computer.
Can I draw as well?
There is a simple image editor alongside it. With layers and brushes, filling a background or dropping text on top is handled here. You can open it straight from an image block, and what you draw comes back into the sheet.
Cost and languages
Free, and no watermark on what you make. The images are yours to use, for fan events and commercially alike.
The interface is available in English, Korean, Japanese, and Simplified and Traditional Chinese. You can switch at any time from the top of the editor.